Authentic Japanese
Sushi Rice Recipe
This is the same sushi rice recipe that my now 80 year old Japanese mother used to make sushi for me when I was growing up.
And I hope you agree, there's nothing like real authentic home cooked food. Whether that is good ole' southern cooking like turnip greens, pinto beans and cornbread... or authentic sushi rice...
The stuff that real Japanese people make in their homes everyday...
with that said...
Let's get started!
Picking your Rice for this Sushi Rice Recipe
You won't usually find instructions for selecting and buying your rice in almost any other sushi rice recipe found on the internet, but it cannot be ignored.
This is a core requirement of this sushi rice recipe and critical for making the best sushi rice.
Get the Japanese Short Grain White Rice...
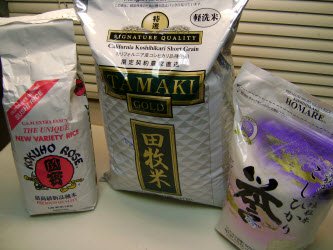
First, you want the super premium Japanese short grain white rice for this sushi rice recipe. Two of the very best that you can get here in the U.S. (in my opinion) are Tamaki Gold and Tamanishiki. In that order.
If you want to get a brown rice version of the 2 choices above, look at the amazon carousel below for "Tamaki Haiga" or "Tamanishiki Super Premium Brown Rice". Both are of the same high quality except that superior polishing techniques allows for the bran to remain on the rice grain with these two technically making them slightly healthier choices.
And don't worry, they are both still glutinous enough for your sushi and taste delicious. I personally use Tamaki Haiga all the time. It has a slightly "nutty" flavor that is hard to beat...
Now for a little more on what glutinous is and why it is important.
Japanese eat rice that is more glutinous than some other asian countries. The more glutinous a rice is, the better it sticks together making it easier to pick up with chopsticks or form into sushi rolls or rice balls.
The short grain rice is the most glutenous. As you move from short to medium to long grain rice becomes less and less glutenous.
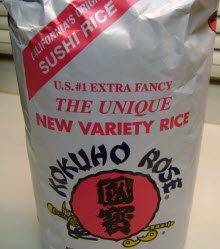
And I don't want to try to split hairs here, because if you want to make the "best" sushi rice you should try to use the short grain. But... with that said, you CAN use medium grain if you can't find a short grain rice (Kokuho Rose and Nishiki both are a medium grain and would be an adequate choice if I could not find a premium short grain Japanese rice). Just try to buy a premium quality that is "First Crop" or "New Variety".
As a side note, that is why in some other asian countries (where they eat less glutinous rice) they can be seen eating their rice with a spoon... because it doesn't hold together and can't be picked up well with chopsticks.
Look for "First Crop" or "New Variety" on the bag for this Sushi Rice Recipe...
Good standard brands that are widely available in the U.S. are Kokuho Rose and Nishiki. Because of this, many people end up picking those up or getting them in sushi kits even though they are really just a 'B' grade variety of rice for sushi.
Premium ones to look for again in the U.S. are, Tamaki Gold and Tamanishiki. In Japan, the Koshikikari variety is the most popular and preferred rice cultivated in Japan. And actually, Koshihikari harvested in Uonuma area of Niigata Prefecture is normally the most expensive rice in Japan.
Tamaki Gold is a California grown Koshikikari that is excellent. It is on par with the best Koshikikari cultivated in Japan.
Tamanishiki is also a California grown rice that uses two kinds of super premium quality short grain rice; Koshikikari and Yuma Gokochi. The combination of the two creates both great flavor and a wonderful texture.
Whichever brand of rice you decide to pick, you want to try to get the rice that is labeled "First Crop" or "New Variety". This rice is picked in the fall and is the best rice for Sushi.
Also, try to find a date on the bag that shows that the rice is no more than a year old, if possible. The older the rice is, the harder it is and the more water it takes to soften; making it more difficult to make good sushi rice.
Ask your Japanese Grocer if the rice is "Shinmai"
If you happen to pick up your rice in a good Japanese Grocery store, ask the owner for his or her suggestion for a good sushi rice and also ask if the rice is "Shinmai". Especially if your rice doesn't have "First Crop" or "New Variety" on the bag. Some excellent rice for sushi won't have "First Crop" or "New Variety" on the bag but will only have "premium short grain rice" on it. In this case, ask your grocer to be sure.
To your grocer, "Shinmai" will mean current years crop and just might impress him (or her), possibly earning you a few brownie points!
Buy the Rice you have to wash, NOT the pre-washed rice for this Sushi Rice recipe
And one more thing before we move on. There is a new type of rice out that has been "pre-washed". This rice does not require the normal rinsing to remove the "starch" that is present with the standard short grain white rice.
Our sushi rice recipe is NOT based on using the "pre-washed" rice. So if your grocer has both, pickup the regular rice that has to be rinsed. The reason being is that the water amounts and even the cooking settings on the fancy rice cookers have to take this into account because they do cook differently.
Visit our Sushi Rice page to get a lot more background on sushi rice in general.
Ok... back on track...
While you are picking up the Rice, also pickup...
- Japanese
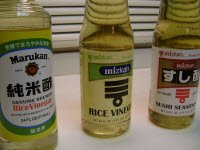
rice vinegar (or pre-made Sushi Seasoning only if you can't get regular rice vinegar). This is required. Any good quality rice vinegar will do. Both Mizkan and Marukan are both popular and widely available in U.S. grocery stores. Go here to learn more about rice vinegar in general.
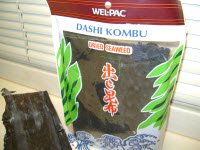
- Kombu
(dried seaweed). If you can find it (most Japanese grocery stores will
have it, if not you can get it here). If you want to follow my
mother's recipe to a tee you'll need to obtain some. Around a 4" x 6" piece should do it for making one batch of sushi rice with this sushi rice recipe. To learn about kombu go here.
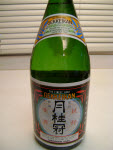
- Sake. You can find this in any liquor store. And again, it is optional but it won't be exactly like mother's sushi rice recipe and won't be as good without it...(it's the little details that make the difference). Normally I keep Gekkeikan sake on hand for this.
Don't Skimp or Skip the Sake and Kombu... and Here's Why...
Before you decide to skip both "optional" items, Kombu and Sake in this sushi rice recipe, let me try to talk you out of it.
I asked my mother why she felt like they were both required and the first thing she said was, "You do want to know how to make Sushi Rice don't you? Because it won't be good sushi rice without it".
Then I said again, "But WHY?"
She then followed up with,
"The Kombu and Sake are both ingredients you use in making good dashi so it gives your sushi rice nice hints of good dashi flavor".
Ahhh! So THAT'S the real reason...
For those that may not know, dashi is a common cooking stock used in a lot of japanese soups like miso and clear broth. Similar to how we use chicken stock in the U.S.
Now, I don't know if you just noticed, but we just witnessed good old fashioned Japanese home cooking in action folks...
the "secret" part of her sushi rice recipe... :-)
No other sushi rice recipe that I have seen on the internet (or anywhere actually...well...at least until now...) use both kombu and sake but I will tell you that I think it does make the best sushi rice.
Try it for yourself, both with and without sake and kombu and let me know what you think!
But Shhhhh... remember... its our little secret...
Rice Cooker, Fancy Rice Cooker or just a plain old Pot?
All in all, I don't think it really matters.
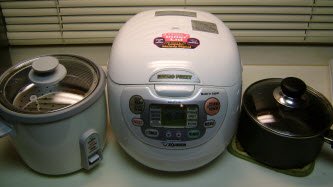
Personally, I have two Zojirushi's. A simple one button one (NHS-10 6 cup) on the left above, and a fancier one (NS-ZCC18) in the middle above that uses the "fuzzy logic" technology that does all of the thinkin' for you (I just love this unit.) It will pre-soak, cook, and steam the rice after cooking for you; all you have to do is wash the rice, put it in the pan, add water and push a button or two.
If you want to learn everything you ever wanted to know about all the different models of Zojirushi rice cookers, visit my review page here.
But overall, rice cookers are nice to have to make things more convenient and to give you more options (like settings for regular rice, sushi rice, keep warm, etc.,). And they do make the rice cooking process more consistent.
In this sushi rice recipe however, we will focus on using a plain old non-stick cooking pot with a lid. Everybody has one, and it will allow those who have not yet committed to investing in a rice cooker to experience the joy and pleasure of making sushi rice with this sushi rice recipe.
The process can be slightly different between using a pot as opposed to using a fancy dancy rice cooker but we'll focus on the pot method first and will cover the minor differences when using different rice cookers afterwards.
How to Make Sushi Rice using a Pot or Rice Cooker for this Sushi Rice Recipe
(This method is geared toward using a pot, with differences for using a rice cookers explained in the recipe. Points that cause confusion between using a pot and rice cooker are explained below this recipe)
Ingredients
The following products are ones I use often and are added for your shopping convenience:
You will need the following ingredients on hand to cook sushi rice for this sushi rice recipe.
- 2 cups of Japanese short grain white rice
- 2 Tablespoons Sake
- 2 cups of water (bottled water preferably) minus 2 tablespoons of water. Add 2 tablespoons of Sake to replace the 2 tablespoons of water in your second cup of water.
- 4 x 6 inch piece of Kombu
And Homemade Sushi Seasoning:
(mix this now so you can occasionally stir it up while you are washing, cooking, and steaming the rice below. This will insure that all of the sugar is dissolved by the time you are ready to use it):
- 4 Tablespoons plain Japanese Rice Vinegar (not the "seasoned" rice vinegar)
- 1/2 teaspoon salt (up to 1 teaspoon on occasion... see below)
- 5 tablespoons sugar (down to 2 tablespoons on occasion... see below)
When and why you may want to vary the Sugar and Salt measurements above on occasion...
5 tablespoons is what my mother normally uses, recommends and swears by... a lot of other sushi rice recipes always only use 2 tablespoons.
Here is why she normally uses 5:
My mother says she has had talks with many 1st class Japanese sushi chefs over the years (in Japan) and although they were hesitant to reveal the "secret" to their sushi rice recipe many did reveal hints; one of which she soon noticed became somewhat of a common thread --- that they preferred to make theirs a bit "sweeter".
With that said, let's discuss when you may want to vary the sugar and salt measurements above (which does lean toward the sweeter side).
In most cases, I make my sushi seasoning just as stated above. It is good in most types of sushi especially chirashizushi, futomaki, most makizushi (rolls) and those recipes using milder flavors and meats.
For Nigirizushi (oblong pad of rice with a topping across the top) and stronger meats and flavors you may want to consider a little less sweet and a little more salt.
Here is what I would suggest:
1. The first time you make this sushi seasoning follow the recipe above using:
- 4 Tbsp rice vinegar
- 1/2 tsp salt and
- 5 Tbsp sugar
2. The next time, try (to me) the opposite end of the extreme which is:
- 4 Tbsp rice vinegar
- 1 tsp salt and
- 2 Tbsp sugar. (not as sweet and a little saltier)
Decide which you like better, or what you like better depending on what type of sushi you are making.
Or experiment and vary your preference between the 2 extremes above until you find your sweet spot.
This is the real test when you are making sushi rice at home... adjust the flavors according to what you are making or to what you like.
Ok. Back on track...
Let's recap...
There are really 3 "secrets" to my mother's sushi rice recipe:
1. Kombu
2. Sake
3. and Her homemade sushi seasoning
Leave any of the 3 above out, and your sushi rice won't be as good as it could be.
Supplies
If you are going to use a hangiri to mix your sushi rice in (which is the best thing to use to mix and cool sushi rice), then fill it with water while preparing your sushi rice. This will help keep the rice from sticking to it. You can also add some rice vinegar to the water so it will be close to the sushi seasoning in case the rice absorbs a little of it. Visit our hangiri page to learn more.
Let's Start by Cooking the Rice for this Sushi Rice Recipe
Try to use a large heavy bottomed non-stick pot with a lid for cooking this rice.
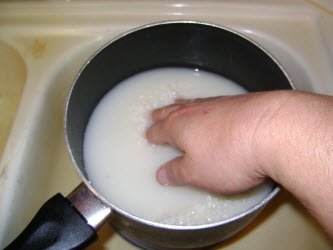
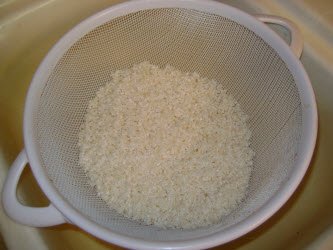
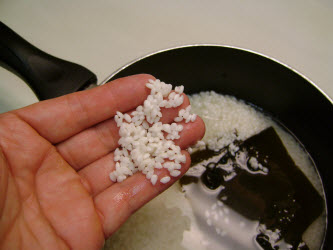
1. Wash the Rice. Put the 2 cups of rice into the pot it is to be cooked in and cover with clear cool water. Swirl gently around with your hand in the pot to remove the "starch" that is on it.
The water will be somewhat "milky" looking in color. Drain the water using a sieve or by placing your hand or a lid on the top and turning the pot slowly sideways to drain the water. Repeat this process 4 to 6 times as necessary until the water is mostly clear. Drain this final rinse water thoroughly.
Here you can let the rice sit in a sieve and drain for 30 minutes or so before going to the next step. My mother swears by it. I promise that I can't tell a difference.
The choice is yours, but at least you know...
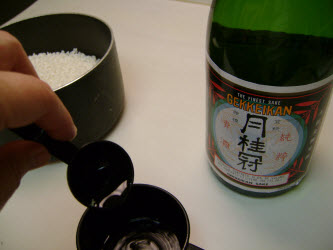
Add 2 tablespoons of Sake to your 2 cup measure first and then fill the remaining 2 cups with water...
** Use bottled water to cook your rice with for the best taste, especially if your tap water is soft, hard, or tastes funky (like if you have sulfur well water). Your rice can be ruined by bad tasting water.
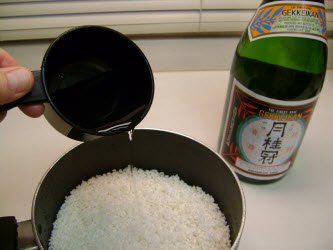
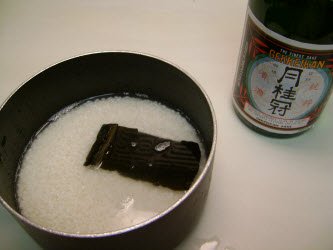
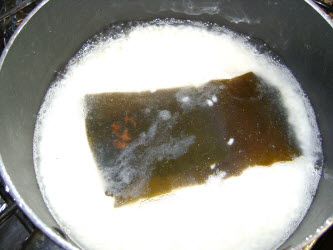
2. Add your water/sake mixture to your rice in your pot.
Lightly wipe off the Kombu if you have it and put it in the pot.
Do step 3 if you are using a pot or simple rice cooker. Skip it you have a fancy rice cooker and it says that "soaking" is not necessary...
3. Set the pot to the side to let the rice soak. What we want is for the rice to turn "white". This is a very important step for pot cooked sushi rice so don't get in a hurry or skip this step. This should take around 20 minutes give or take a few minutes. This results in a shinier rice with a better texture.
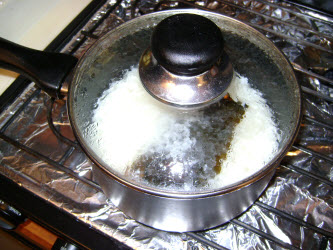
4. Turn the heat up to high, bring to a boil.
Reduce heat to low to reduce to a simmer. Put the lid on the pot. If using a rice cooker, just turn it on according to directions.
5. Cook for 15 minutes and then turn off the heat. Your rice cooker will automatically turn off when it is done.
Do step 6 if you are using a pot or simple rice cooker. Skip if you have a fancy rice cooker and it says that "steaming" is not necessary or that you can open the rice cooker and fluff the rice as soon as it stops cooking or turns off...(this is normally because the "steaming" is already factored into the time the unit stays on...)
6. Let the rice "steam" for 20 minutes. DO NOT take the lid off of the pot during this time.
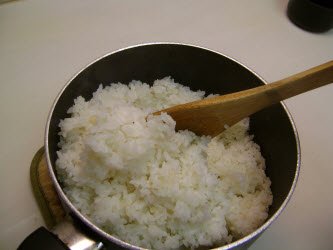
7. Take the lid off and fluff the rice by turning it lightly over a few times using a wooden rice paddle. Replace the lid while you prepare your sushi seasoning. Either way, wait 5 minutes after you fluff the rice in this step before going to the next step.
Make your Sushi Seasoning
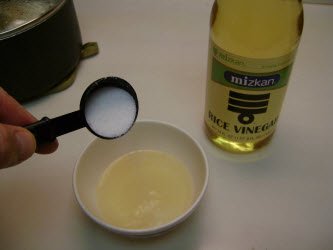
8. Mix together the 4 Tbsp rice vinegar, 5 Tbsp sugar and 1/2 tsp salt in a small bowl. You can microwave it a little to help you get the sugar to dissolve if you need to (Mom doesn't agree so she doesn't microwave it though...she just keeps mixing till it dissolves...)
I usually will start mixing the sushi seasoning while the rice is soaking, cooking, and then steaming and will periodically mix it to allow the sugar to dissolve more slowly. By the time the rice is done, the sugar will be dissolved and it will be well mixed.
Mixing the Sushi Seasoning with your Rice
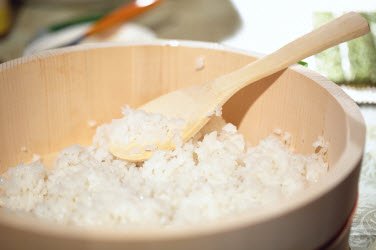
10. Next dump the hot rice into a very large bowl or preferably in a traditional wooden sushi tub called a hangiri. It is also referred to as an sushi oki. If using a bowl as opposed to hangiri, put a damp towel under it to keep it from sliding.
*** And as a side note, don't try to scrape the harder rice up that may be stuck to the bottom of the pot. Leave it in the pot if it is stuck or hard or "crispy". These harder pieces will not be good in your sushi rice ***
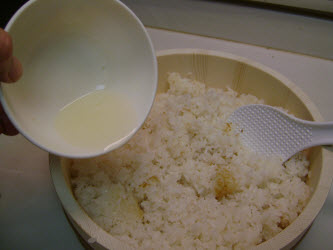
11. Spread the rice out and pour the vinegar mixture all over the rice. The brown spot in the picture is not burnt rice, but rather where the kombu laid on the rice it left a brownish stain.
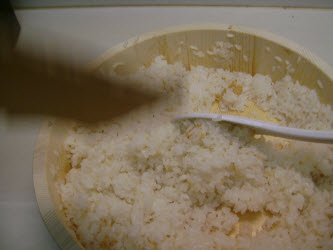
12. Now, if you have an electric fan (this is what I use), point it down over the rice from your right or left side so that it blows over the rice. Try to mix the rice using a side to side cutting motion with the edge of your wooden spoon.
What you are trying to do is coat each grain of rice and cool it quickly at the same time without mashing the grains of rice. All of this helps to evaporate the liquid faster which gives the rice a nice shine and also helps prevent mushiness.
13. If you don't have an electric fan, then use a hand fan or a piece of cardboard (as in the picture-I did that to show off-I usually use an electric fan :-) in one hand while using the mixing motion described above with your other hand. Its a bit trickier since you can't use one hand to hold the bowl or hangiri in place, but you'll quickly get the hang of it.
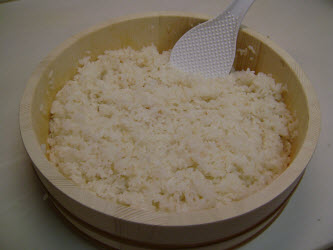
14. You can stop mixing when everything has been absorbed and is no longer wet and slippery, the rice is fluffy and each grain is very shiny.
15. Cool to room temperature before using to make your sushi. You can cover the Hangiri with a damp tea towel or damp cloth while it is cooling to keep the rice from drying out.
And there you have it. This is how to make sushi rice using the best sushi rice recipe available out there.
Congratulations!
You now have Sushi rice that most sushi chefs would probably proudly serve in their restaurants and a sushi rice recipe that most would like to know!
Now... What do you make with your Rice? Here's a few suggestions...
Now that you have your most basic essential ingredient you are ready to make either your favorite nigiri sushi or maki sushi.
If you don't know how to "roll", visit our "How to make Sushi Rolls" page to learn how.
If you need fish but don't know where to buy it or what to look for so that you know that it is safe to eat, visit our sushi grade fish page to learn more.
If you are new to all of this in general, here's a few excellent suggestions for things to start out on.
First and foremost, you can't go wrong with a California roll. Everybody loves crab and there is no raw fish to consume so it is a great "beginner" recipe to try. The ingredients can also typically be obtained at your local grocery store. Check out our California roll recipe if you want to give it a try!
Another one that I highly recommend for you to try is this Seared Ahi Tuna Recipe... and although it does not call for rice, the seasonings that it is encrusted with along with the heavenly, creamy ginger soy sauce that you dip it in will absolutely make your mouth water every time. Guaranteed!
Making Sushi Rice with a Rice Cooker
Let me start by saying that the basic rice cooking process is still the same. There just seems to be some confusion involved with this depending on how simple rice cooker or fancy your rice cooker is and whether or not you read the "how to use this rice cooker" directions before you follow this recipe.
Most of the confusion seems to come up if you actually read the directions that came with your rice cooker.
For one, the measurements stated in this recipe are in U.S. cups. The cups mentioned in the rice cooker instructions will be referencing the cup that is provided WITH the rice cooker which will be less than a U.S. cup.
The water fill markings inside the rice cooker container will relate to the measuring cup that was provided with the rice cooker.
In some cases, especially with the more expensive units, you will have a mark for 'regular' rice and one for 'sushi' rice. The sushi rice markers will be lower than the regular rice ones because they are reducing the amount of water needed to create a firmer slightly drier rice, to compensate for the sushi seasoning vinegar that you will add later when you mix that liquid with the rice after cooking.
For this sushi rice recipe, ignore those water fill markings.
Just measure the rice and water in U.S. cups as stated in the recipe and turn it on and you will be fine.
And secondly, if you are using a fancy rice cooker with all the bells and whistles, you may NOT have to do the 20 minute soak to get the rice white before cooking (although it probably wouldn't hurt anything if you did anyway) and you may not have to wait 20 minutes to "steam" the rice after the unit cuts off as the steaming may already be compensated for during cooking time...
Just read the instructions with your rice cooker to make sure.
That will keep everything simple for you if you are new to making sushi with a sushi rice recipe or using rice cookers.
After you become familiar with both and have had great success, then experiment with all of the settings that your rice cooker may have.
Like this Page?
|
|
Follow me on Pinterest




New! Comments
Have your say about what you just read! Leave me a comment in the box below.